
By Katie Naphas /// Features Editor
If you’re short on time and energy, but you still want a simple way to brighten up your living space, this column goes out to you. Making a banner is super easy and cheap, and it definitely adds a bit of light to any space. So for me, it’s a win-win. Choose an inspirational word or phrase or (if you’re like me) an inside joke and you’re good to go. All you need is scissors, construction paper or cardstock (depending on how nice you want it to look), a way to measure, puffy paint, and materials to hang it up (I used twine and wall putty, but you could go with yarn, tacks, etc. — it’s all up to you).
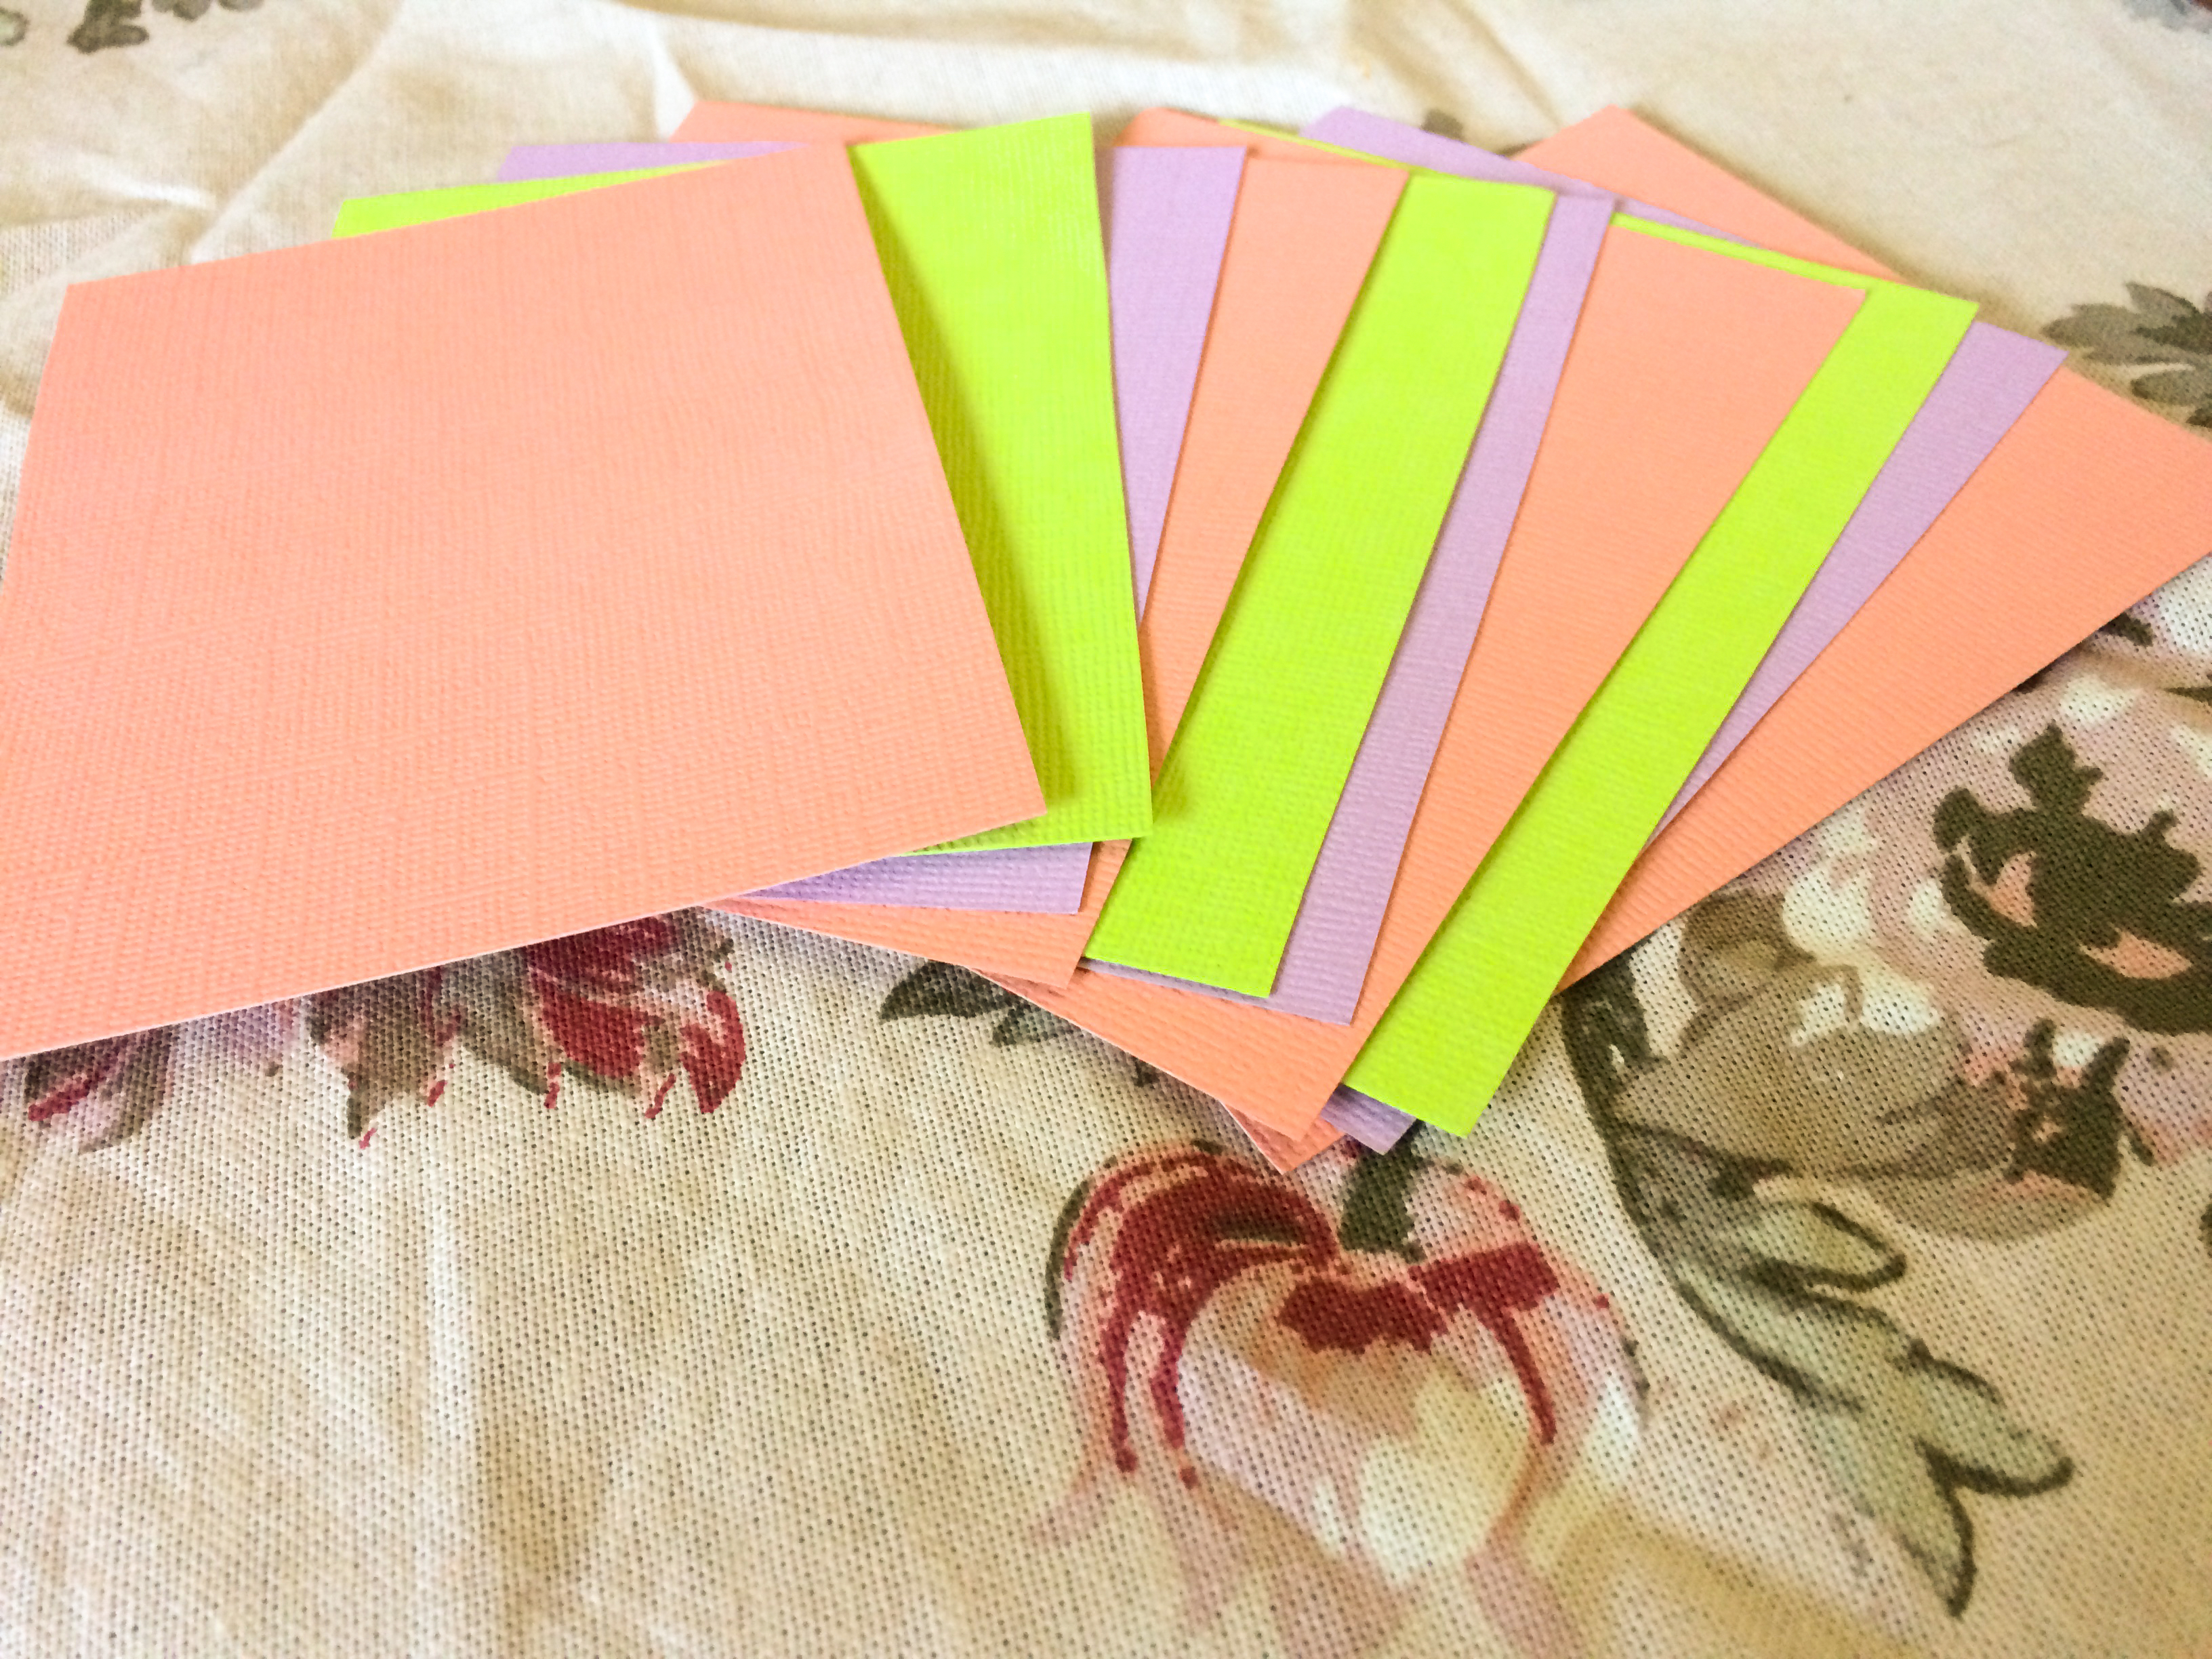
First, you need to pick out some paper. I wanted my banner to be durable, so I went with cardstock, but that’s not necessary. Next, I chose a few colors for the paper, because the prospect of having a monochromatic banner bored me. I picked out a puffy paint color that complemented my color scheme and I was home free. Once you have your paper ready, measure and mark out each banner pennant to make them all approximately the same size and cut them out. I chose to go with 4 ½“ x 3 ½“ for my pennants, but you can size up or down according to how much space you want to fill.
Next, you’re to figure out what you want to do with your pennants. I personally like the look of less basic pennants, so I measured and marked the center of each pennant about an inch from the bottom, then cut from the corners of the bottom of each pennant towards the mark and got a nice flag shape for each part of the banner.
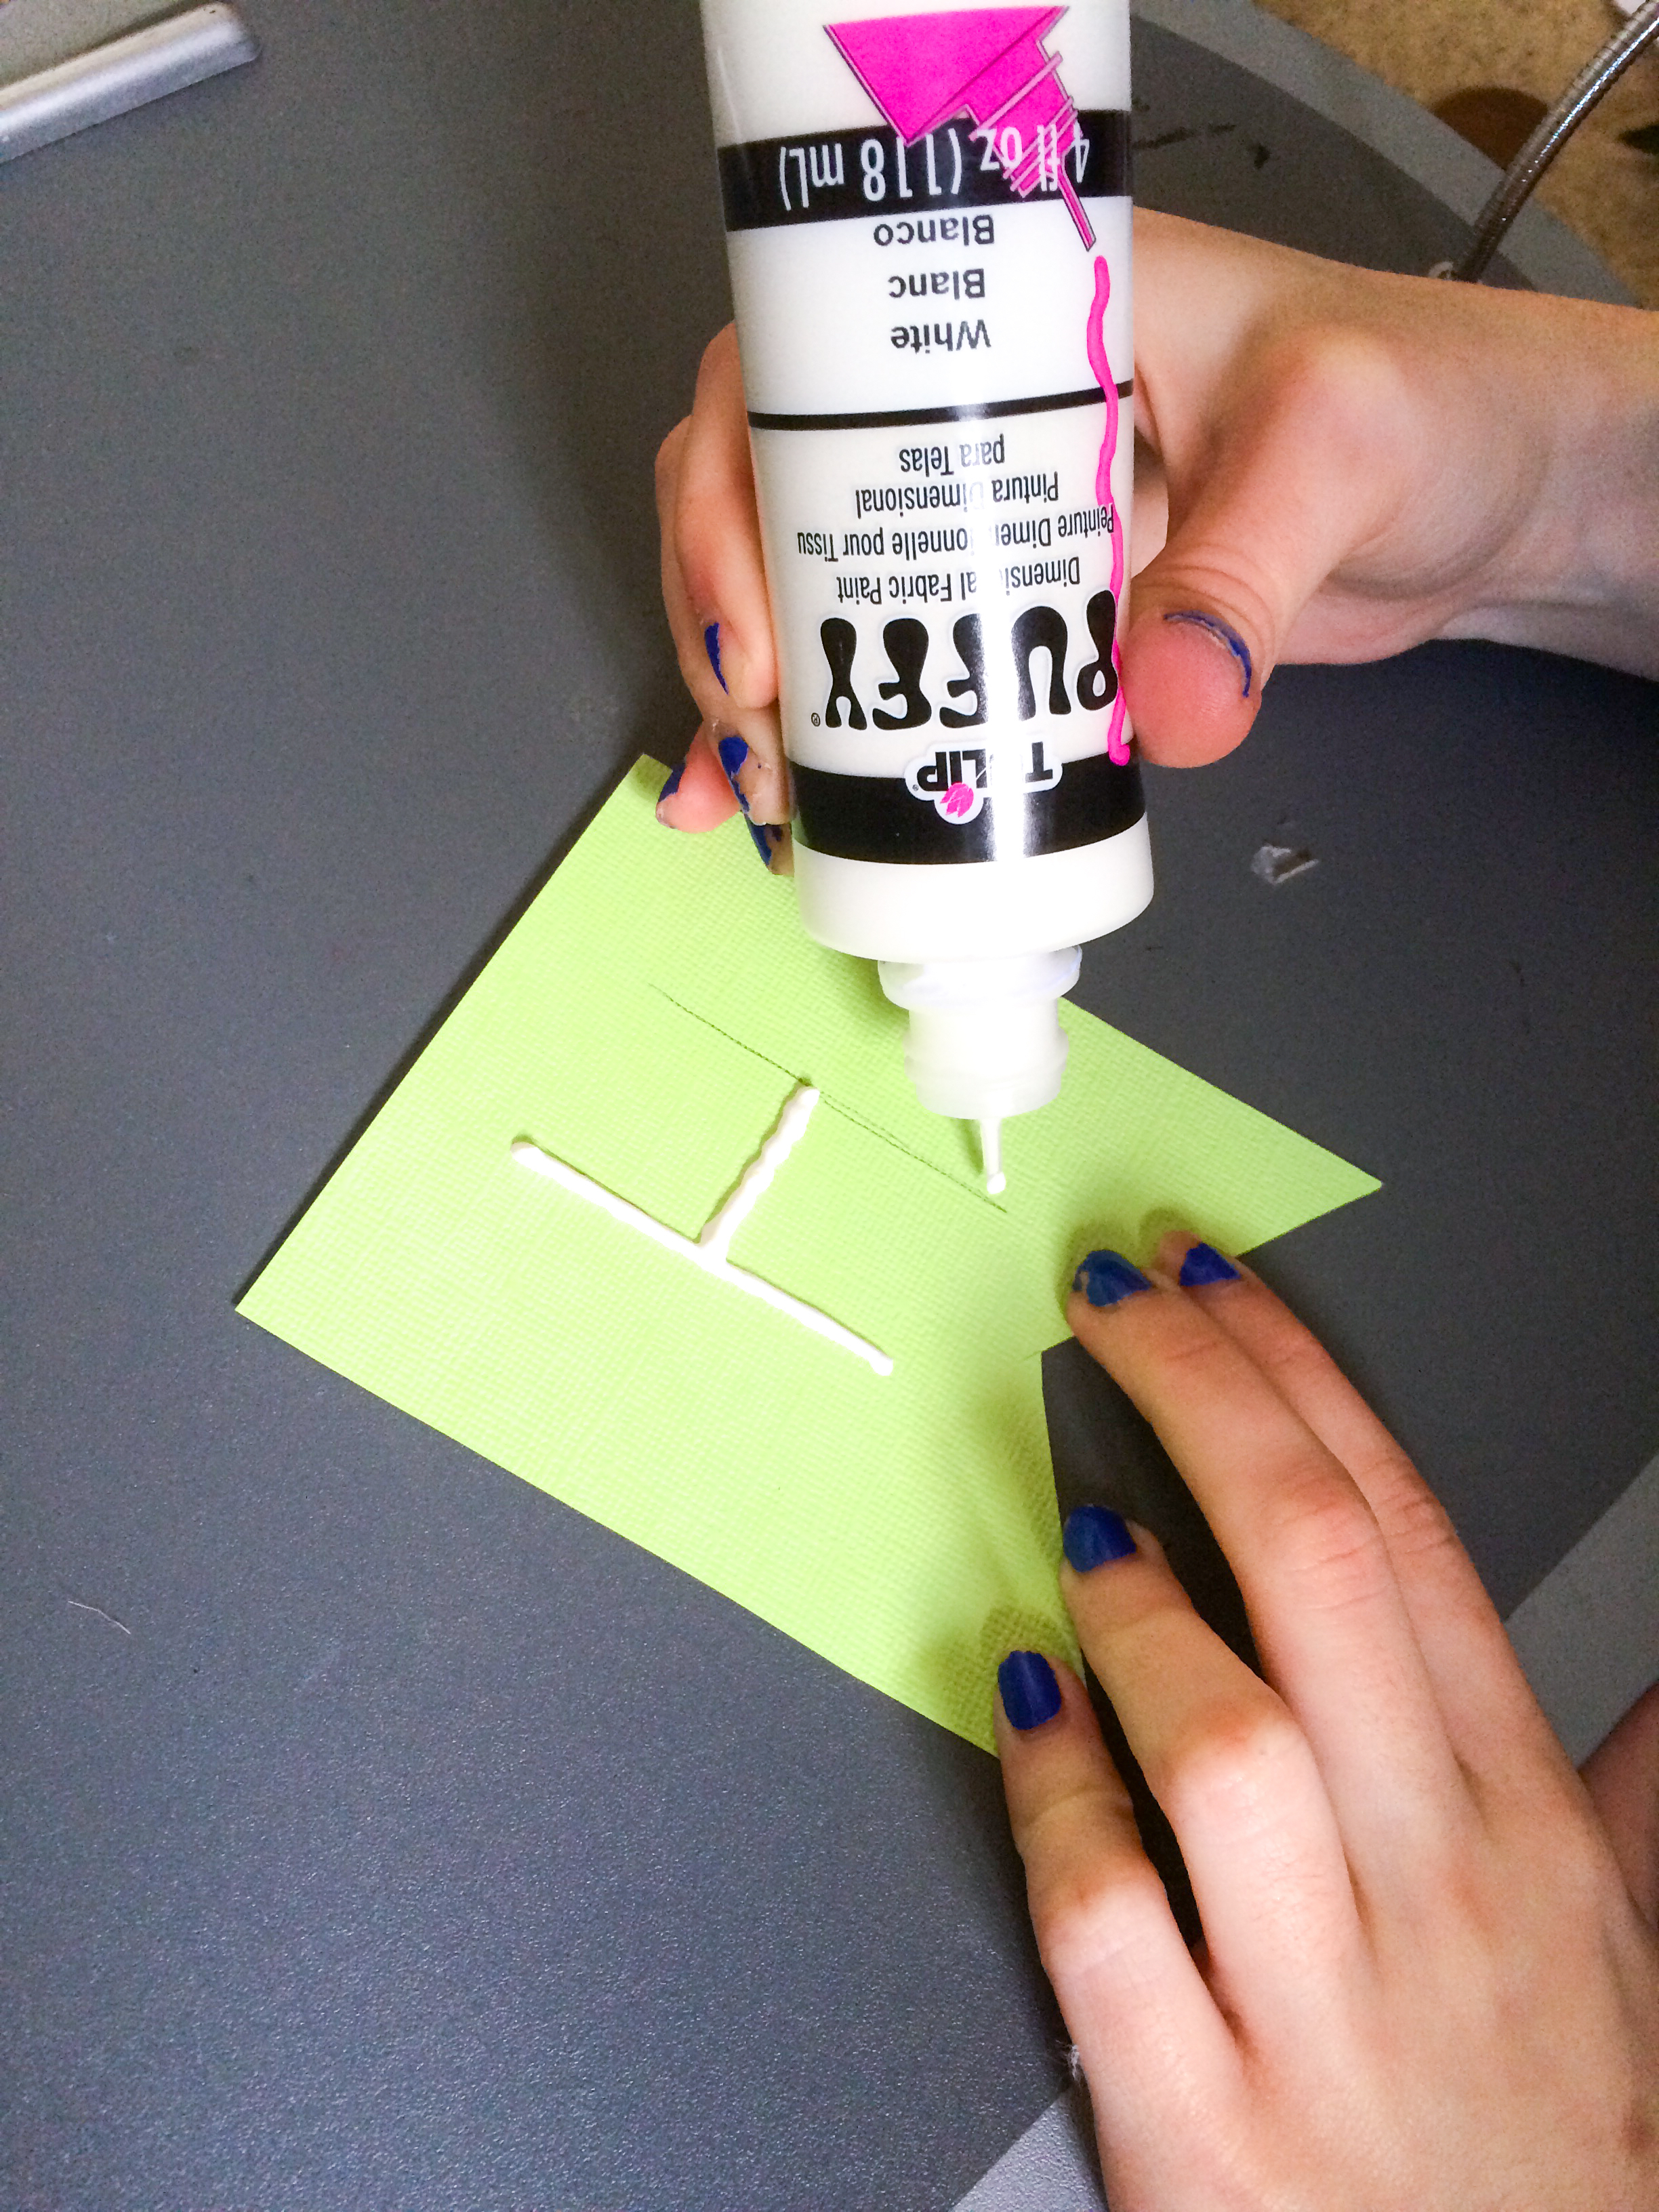
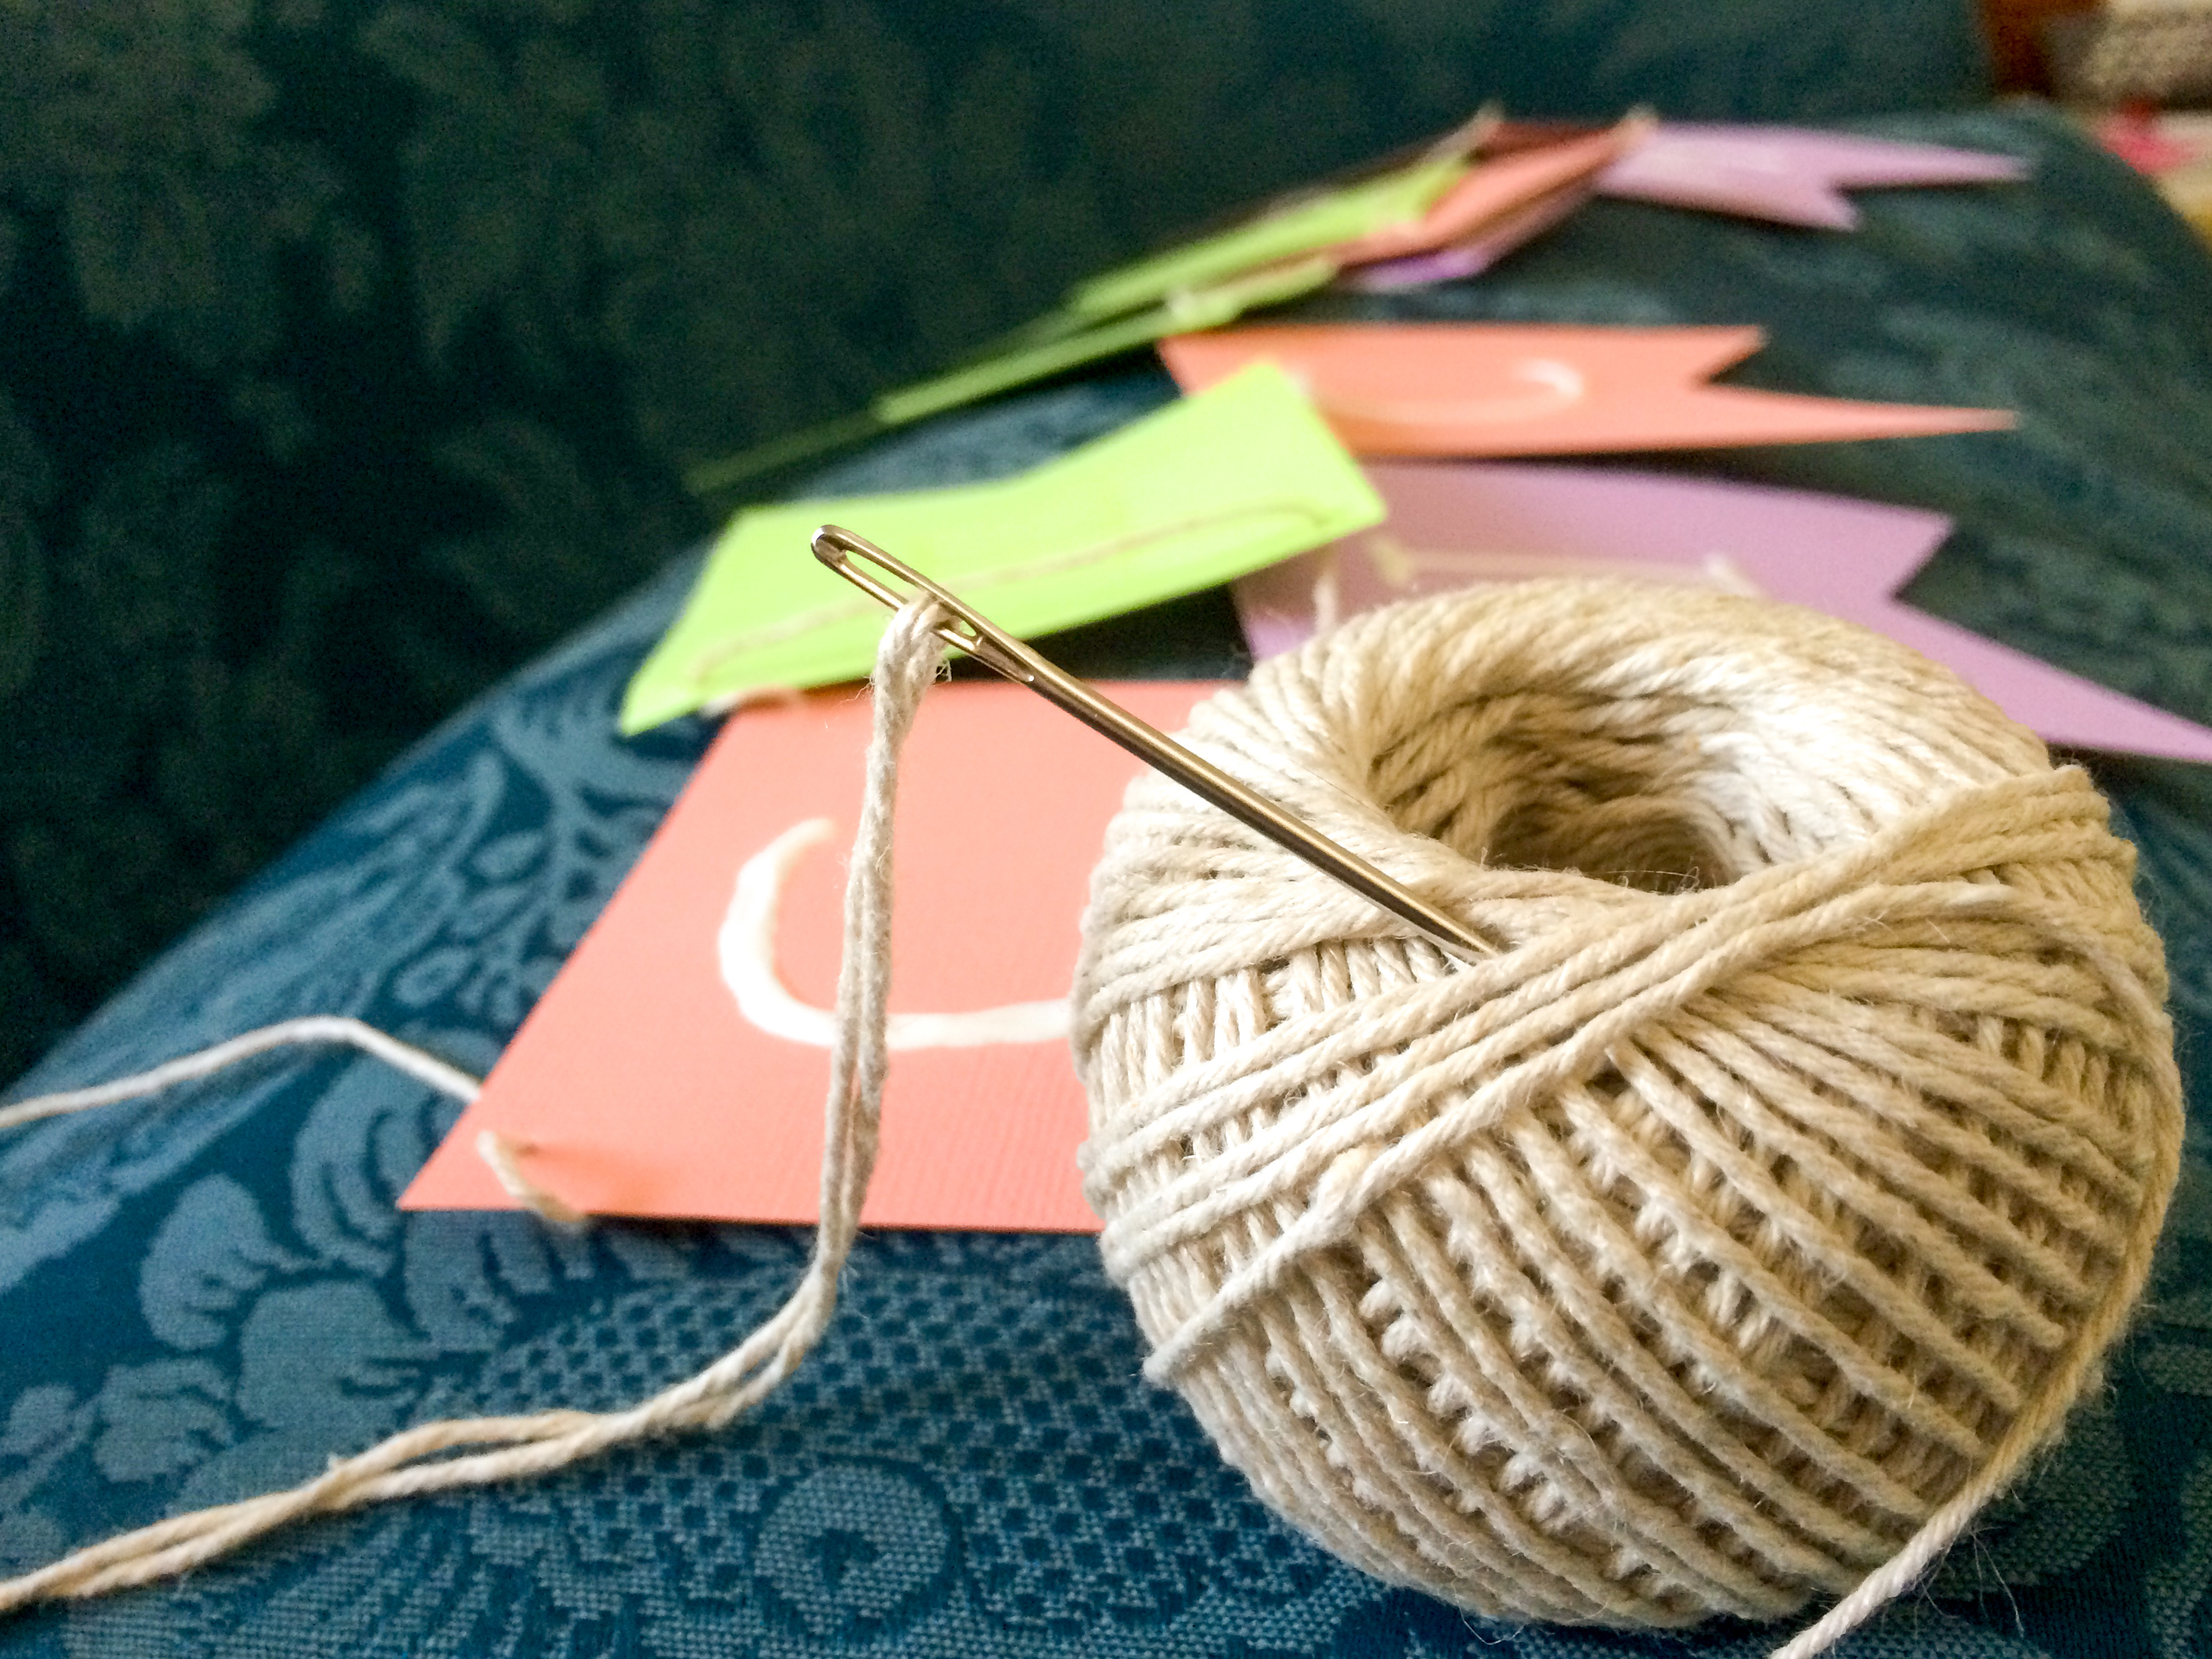
After you’ve done that, take a pencil and write a letter on each pennant (except for the ones serving as spaces). Take a trip back to middle school, break out the puffy paint, trace over each letter for your banner, and then set them aside somewhere to sit and dry. Once your pennants are dry, pierce them with a hole puncher, pencil, or a big needle (like I did), and string them together. I decided that for the size and colors of my banner, I wanted the twine to go under the paper, but go with whatever you like. After that’s done, cut your string and tie it, then display your banner wherever you want. Because the banner worked best in my apartment in a place I couldn’t pierce with tacks, I made bows with the twine to cover up the fact that I was attaching them with blue putty.
Overall, this project took about an hour to finish (not including shopping or drying time), and it resulted in a nice-looking custom banner that not only filled space, but also enlivened it. I’d definitely recommend doing this if you’re tired of looking at empty walls or need a change of scenery.
Subscribe to the Mossy Log Newsletter
Stay up to date with the goings-on at Lewis & Clark! Get the top stories or your favorite section delivered to your inbox whenever we release a new issue.
Great improvement over the previous empty space. Not too costly, not too difficult, but effective. Clearly there could be different banners for different times of year or events or whatever. The bows work well too. I never heard of puffy paint – maybe not available in the UK but it looks fun. Incidentally, very nicely done nails too.